
Worbla
- Dec 9, 2020
- 7 min read
Updated: Dec 10, 2020
Worbla is a thermoplastic, which means it can be heated up, molded and then it will retain the shape once it cools. It is made of resin and wood flour, basically a gluey wood pulp mixture. Like many materials found in the world of cosplay, people make it at home themselves (with mixed results). It is thanks to cosplay that this material is so well known and that the company has been able to produce different versions, including TranspArt, a transparent version that I also used to make a mask. It is smooth and shiny on one side and a bit bumpy on the other, either side may be used.
I started with Worbla because it is the material I am the most familiar with. I used a sheet of Worbla to make my first prototype, I didn’t remind myself of anything, I just thwacked it on. It had been over a year since I touched a thermoplastic and I made easy mistakes like overheating the Worbla and stretching it too thin, but I was still able to work with it.

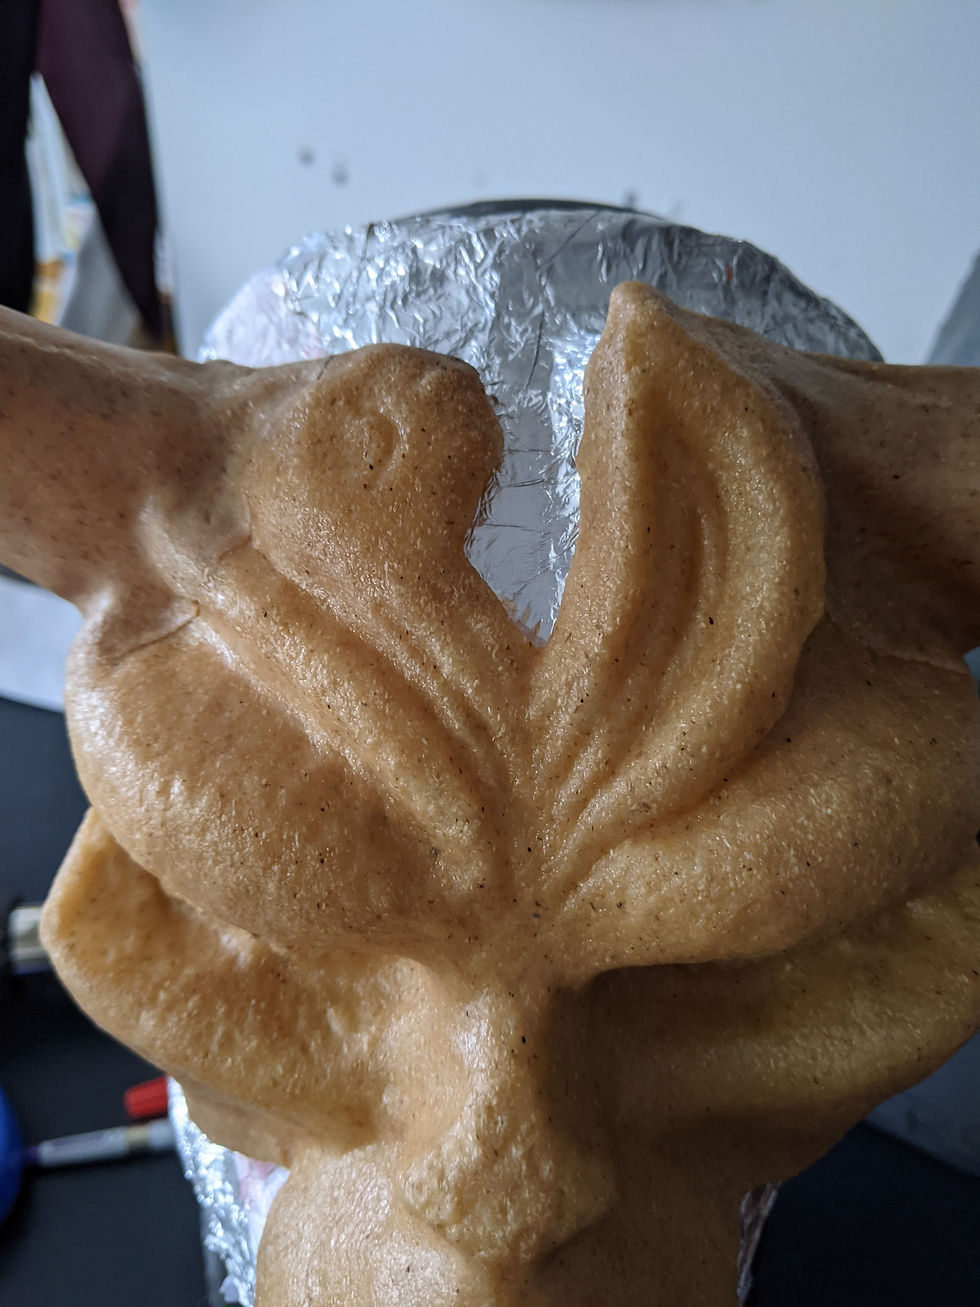
I used a heat gun on low to heat up areas and work in the general shapes. I started shaping the nose bridge and the right eye and right cheek (It wasn’t until I was in the Fosshape that I started in a more symmetrical fashion, more on that later) and worked my way around the face making the big sweeping lines. I did all of this with my hands and no tools.

I then used the heat gun and some modeling tools to get the relief areas as well as make the lines deeper and crisper. I felt this worked very well besides the dangerous thinning of the Worbla over the protruding cheekbones. After I was satisfied with the lines I began to texturize the Worbla.

In the original six masks I had picked one of them that was particularly bony looking and I discussed ways to make that happen in many of my interviews. In our interview, Mio Guibernic mentioned that there are skin templates made for sticking into clay that work really well with Worbla so I excitedly bought a set.

I purchased them before I decided to only make one design. Rather than send them back I deemed it a challenge worth doing and decided that this mask would be bony instead of the colors of the original. I took the “knobbiest” looking ones and did some tests on scraps and decided the one with the highest relief looked the boniest. I then went about heating up parts of the mask and pressing the rubber stamp into it.

Sometimes I would pull the stamp up and the Worbla would come with me, pulling away from the face. It is important to note that I did all of this in one day and did not let the Worbla cool completely in between these different steps.
This was a mistake, in fact in every material I found it was really important to wait for the material to set before doing other steps or you risk pulling the entire thing out of whack, which is exactly what happened to this mask. I don’t know when or where the problem happened exactly, but somewhere along the way the mask started bowing out and became less snug on the head. I tried to remedy it but nothing seemed to work. I found this was a common problem in making the masks; keeping the horizontal curve tight enough to hug the cheeks as they often wanted to open up.

Even though it had become a bit looser I still wanted to work with this mask so I cut out the eye holes. To my dismay I realized that in order for the mask to fit a real face I had to cut away much of the “eye socket” of the mask, making the dramatic sunken eye effect look less severe or interesting.


This happened because of two reasons. The first is because by building up clay on the nose bridge I had made the depth from nose to eye far too deep, which is why I redid the sculpt as mentioned in the introduction. The other reason is because the false nose makes a big hole in the back that a real nose can slide into, pushing the mask too close to the face. It was clear in every mask I was going to need to fill in that area to keep it steady and secure on a face. I debated building up the cheekbones and eyebrows and continuing to use that mask, but it seemed wrong to start in a bad place when I could start correctly. That being said, if I were in a crunch and there was no more Worbla I’m confident I could’ve made it work.
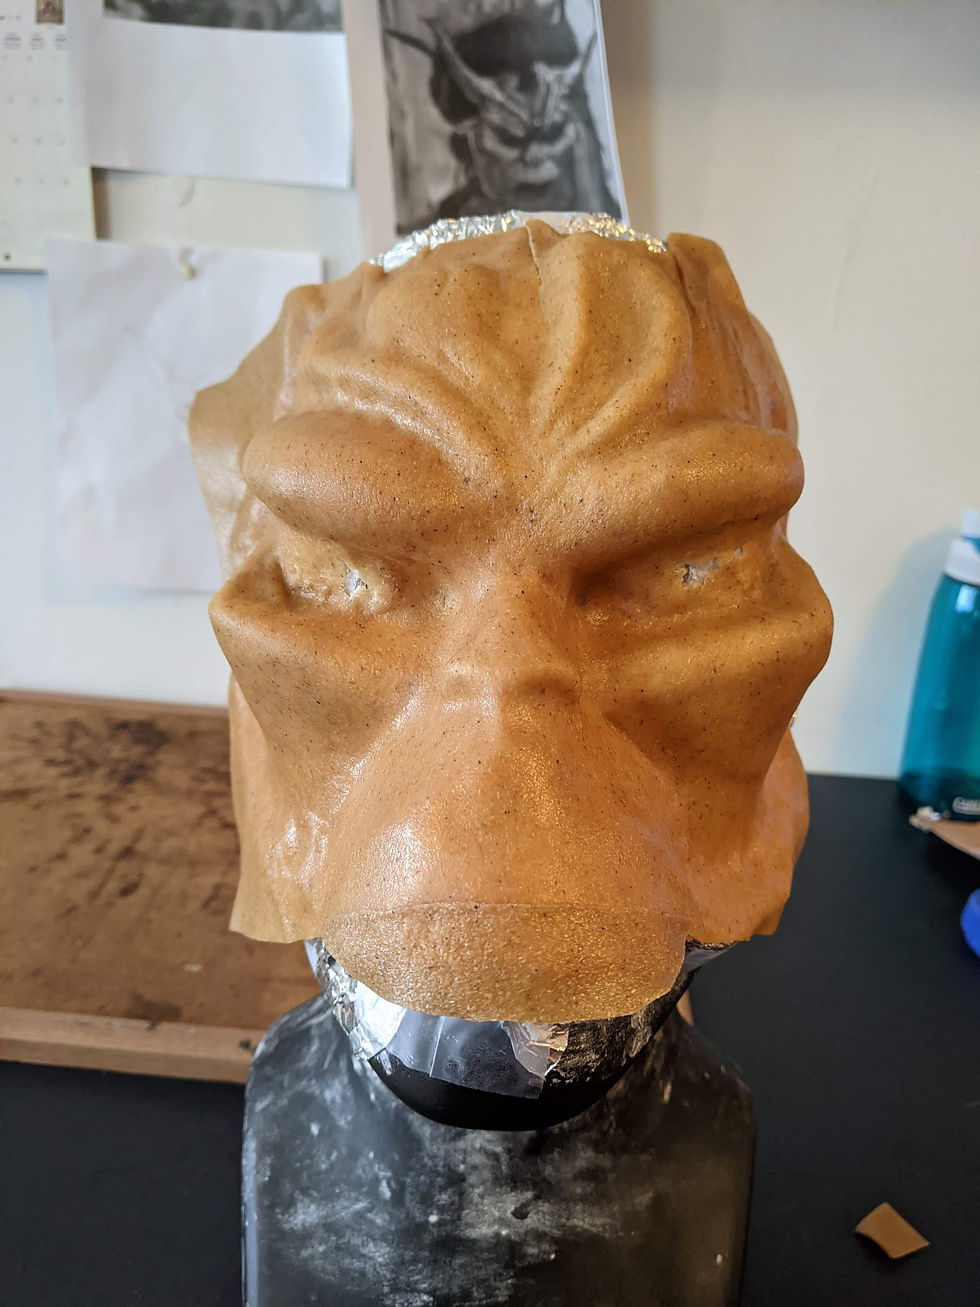
After I had sculpted my improved clay mold I again wanted to use Worbla to make my first prototype. This time I made sure to give plenty of Worbla for the inside of the eyes as I didn’t want the cheekbones to thin out. I formed both the eyes loosely to anchor it and then did the other big shapes.


I let it cool for at least an hour. I wanted it to be totally hard by the time I started detailing, which was much more successful. I also used the blowtorch to do the details this time instead of the heat gun. This allowed me to be more precise by only heating up the areas I wanted to work on.
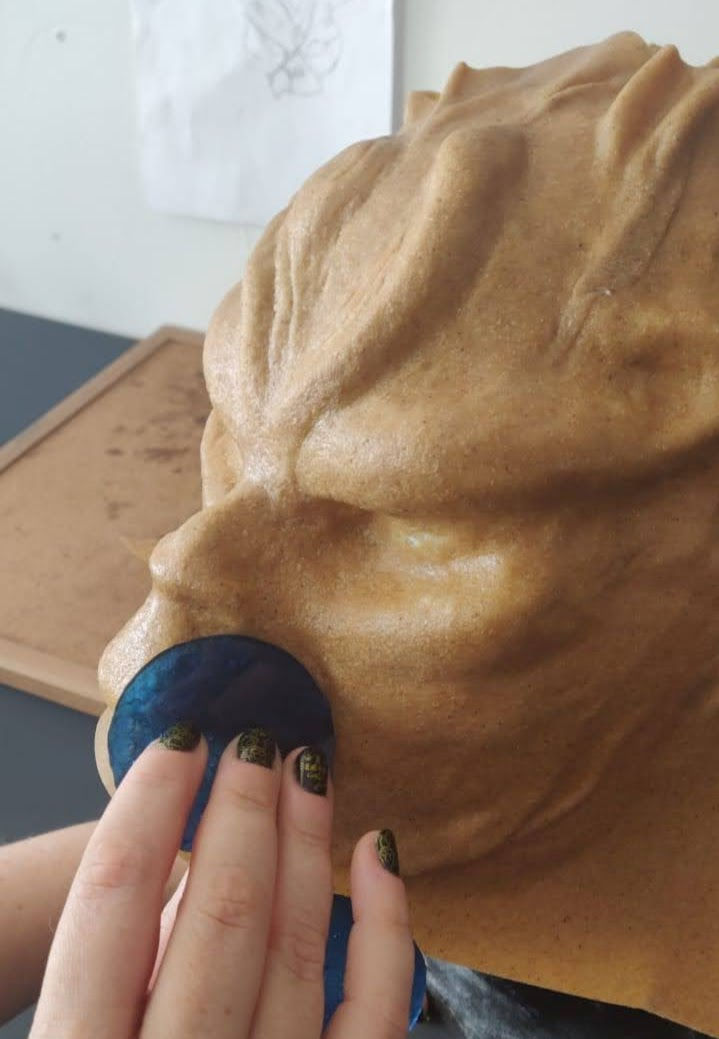
When I was satisfied with my details I let it cool completely again before I used the skin templates. This time with the templates I was gentle and again used the torch. I also gave lots of cooling time in between doing each side of the face and tried to never tug on the material. This meant I did not stretch it out of shape and it was just as snug as it was before the texture.

The first horns I made for this thesis were also out of Worbla. I first created a pattern by wrapping my clay horn in saran wrap and then duct tape to draw a pattern. I made a one piece pattern with darts as well as a multi piece one with horizontal seams.

I made one horn out of each method (before I realized I was over complicating things and I really only needed a front and a back piece). I busted out my new craft iron (more on that in the Fosshape section) and put in the hot knife attachment to use it to try to cut the horn pattern out. I wasn’t impressed with the way it cut, it was jagged and messy. I found using my craft scissors was a much cleaner cut because scissors don't involve any dragging motion. The darted one didn’t come together as smoothly as I would’ve liked, I also used a soldering iron to make the seams and found that it made everything a good deal more messy. I am fairly sure I have a soldering iron that is too hot for the tip that’s on it and it has given me nothing but trouble and I avoided using it. The horizontal seams horn came together much nicer with the curve looking better and all of it looking generally smoother. All of the seams were made by butting the Worbla end to end, I believe this was a mistake. I got away with it this time but i just don't feel that was a smart or secure choice, overlapping and then smoothing would’ve been the correct way to do it. I used sandpaper and tried to get the bumpy horns a bit smoother, let them cool and then went about attaching them.
I didn’t have a good plan to attach them, I was just planning on slicing vertically on the base of the horn and letting the tabs spread out and then fuse them to the mask. And that’s exactly what I did.


It did not look good or well planned and the base of both horns collapsed inwards as they were also getting warmed up. I also found my horns were not the right shape (more on that in the foam clay section). Thankfully Worbla is forgiving and I removed the first set of horns. I was surprised to see the tabs I had made popped off for the most part, I was grateful that I hadn’t fused it so well.

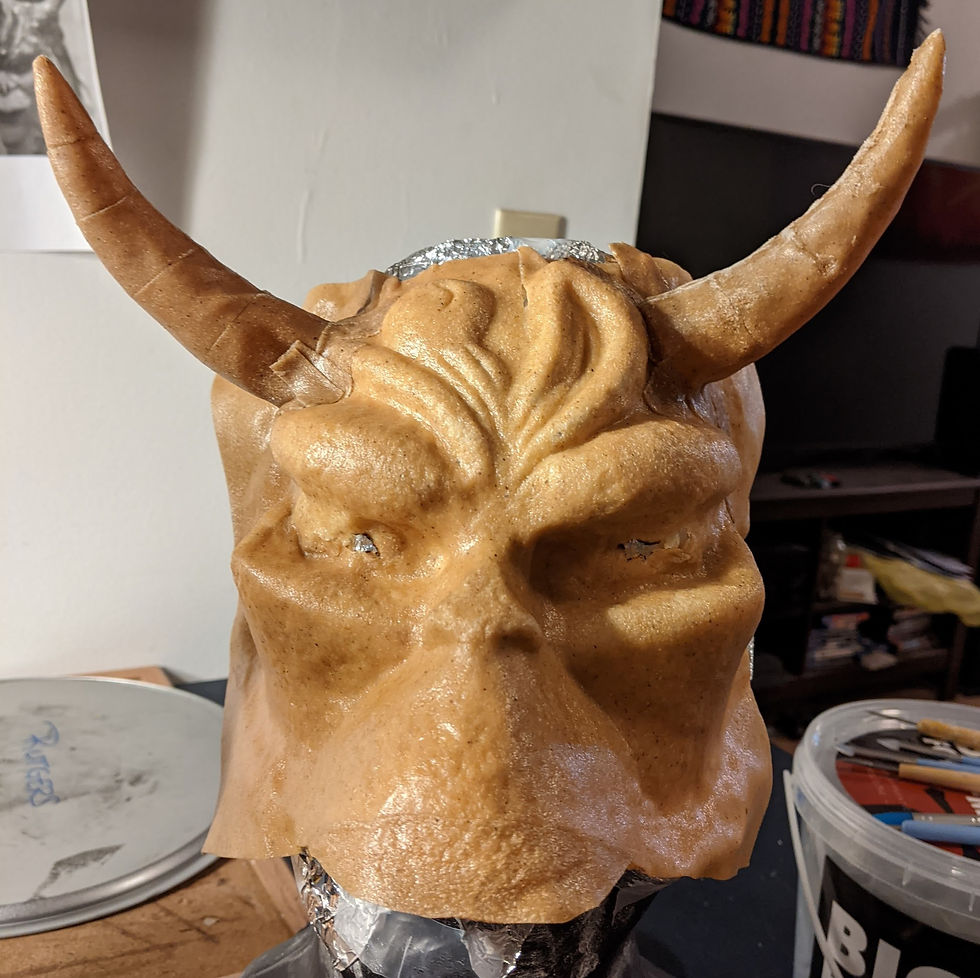
I made the new horn pattern with a seam going lengthwise around the whole horn and cut out the pieces in Worbla. Making the horns was incredibly easy, I just heated up one half, draped it on the horn mold, heated the other side, draped it on the mold and then pinched the seam between my fingers until it had fused.


Attaching them was also easy, the base didn't seem like it was quite wide enough but I was able to stretch it to where it needed to be (I did not use the terrible tab idea again). I used modeling tools and my fingers to smooth the edge of the horns into the mask.


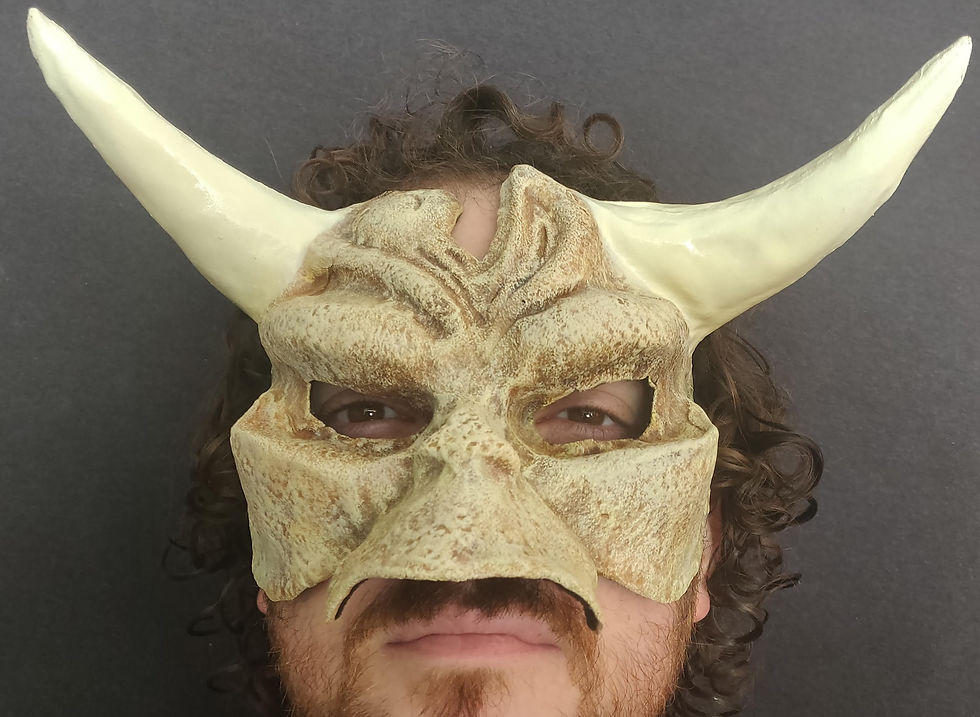
I then drew the shape of the final mask and cut it out leaving about ¼ hem allowance, which I then heated up and folded back so the mask would have a nice rounded edge. In adding the horns and hemming it I lost some of the texture I once had, so I heated up places and reapplied the skin template.

I nearly messed the entire thing up during this process, one of the difficulties with a material that reacts so well to heat is that you can inadvertently destroy all of your work just when doing finishing details. The last making step was to do something about the hollow space beneath the nose of the mask, it needed to be filled in in order for the actual nose to not slip into that hole.

I used a small wad of foam clay and stuck it in, placed the mask on the form’s nose and then let it sit. I used this method on the Fosshape and Wonderflex as well.


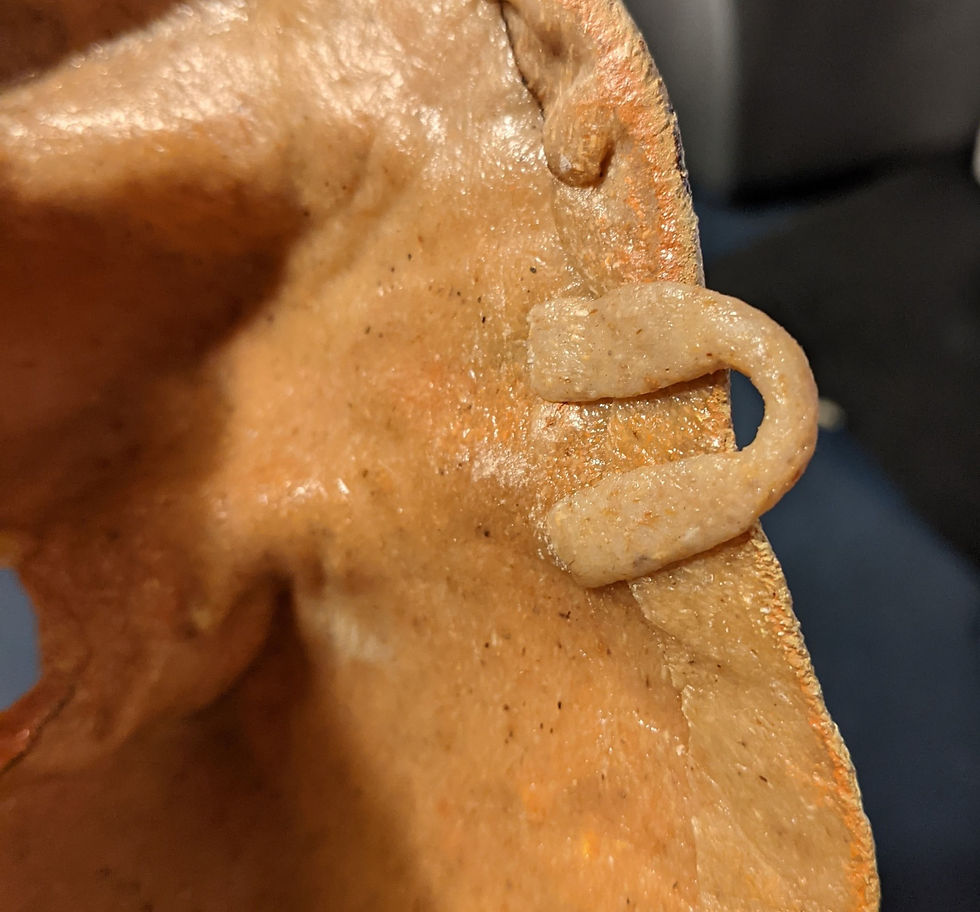
After painting (please see painting section for what I did) I finished the inside with felt and added two small Worbla loops for the elastic. This was the easiest and cleanest looking way of dealing with the elastic I used.


I really like working with Worbla. Because it’s so stretchy it’s pretty forgiving and it is easy to fuse to itself. I have worked with the black version before, which is supposed to be the same, but it is not as sticky as the original Worbla. Of all the thermoplastics I felt it was the one that set the quickest (with Wonderflex making a close second) and that was part of the ease of use. It does have some drawbacks, it has a tendency to thin, which is visible on one of my eyebrows and it is also relatively weighty. This is certainly the heaviest mask in the bunch, the horns accounting for a lot of that weight. But even with its weight it is not too heavy to be worn. It’s heaviness also makes it feel a bit more sturdy than some of the other masks. I don’t think it would be damaged easily.
Comments