
Foam Clay
- Dec 8, 2020
- 8 min read
Updated: Dec 10, 2020
Foam clay is not a thermoplastic, it is a material used in cosplay, though even there it isn’t as common as something like Worbla. When wet it has the consistency of silly putty so you can sculpt it, but when it dries it becomes foam. I learned about it in my interview with Mio, he brought it up when we were talking about even more alternatives like carbon fiber. Carbon fiber was definitely too intimidating to even begin thinking about but foam clay sounded fascinating. I watched some tutorials and reviews of different foam clays and ended up buying Foam Mo. I think it’s worth saying that the original foam clay is from Lumin’s Workshop in Australia, it’s possible it works differently or even better but their American distributor was having shipping delays so I didn’t end up going with it.
When it arrived I immediately made a solid little bird and pressed some clay around a button to see if it could take the negative. I checked on the little bird I made constantly as it dried. The outer layer dried very quickly, but it remained squishy for a week, at which point I cut it open to see what was going on inside. Much of the inside was still sticky and wet, it is only after about a month that I don’t think there was any moisture on the inside. I continue to check it to see if it’s gotten harder, which it has. It is not quite rock hard yet but I am curious to see if it will be in another month. My negative didn’t work super well, it was still wet on the inside so it clung to the button. I learned later in watching one of the many tutorials that when using a mold it’s best to put it in the freezer to get all the moisture out. I imagine the same would be true for making a negative.

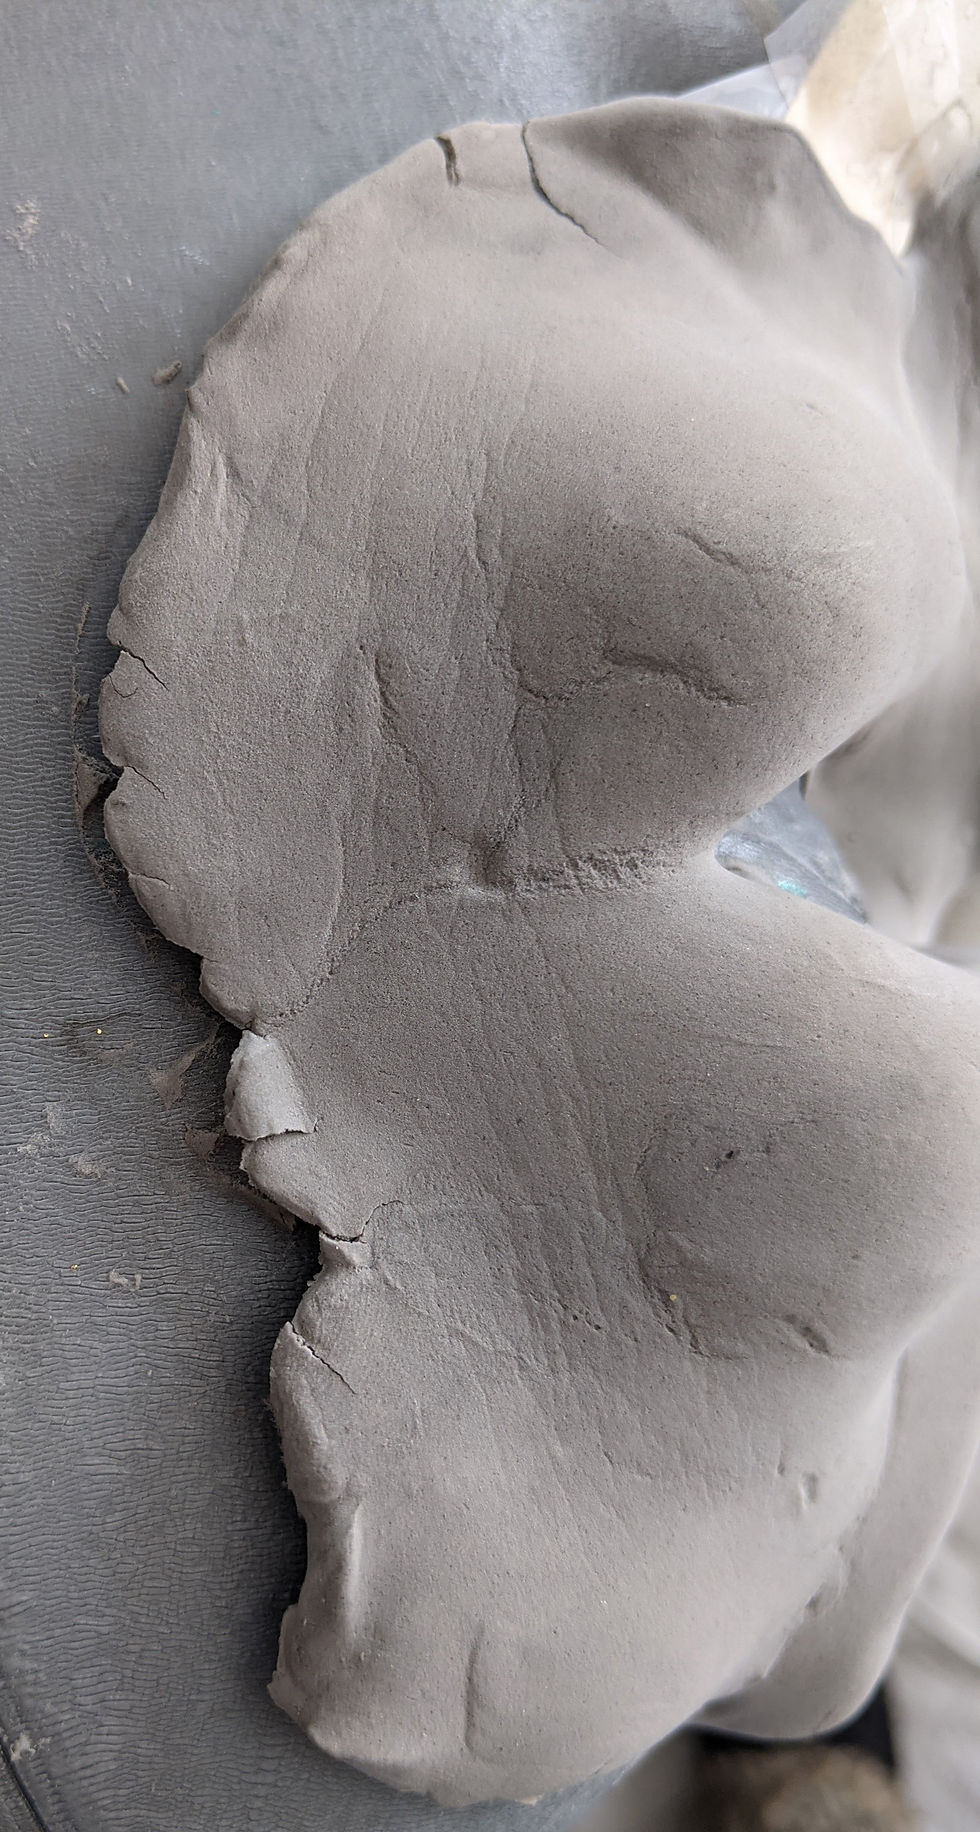
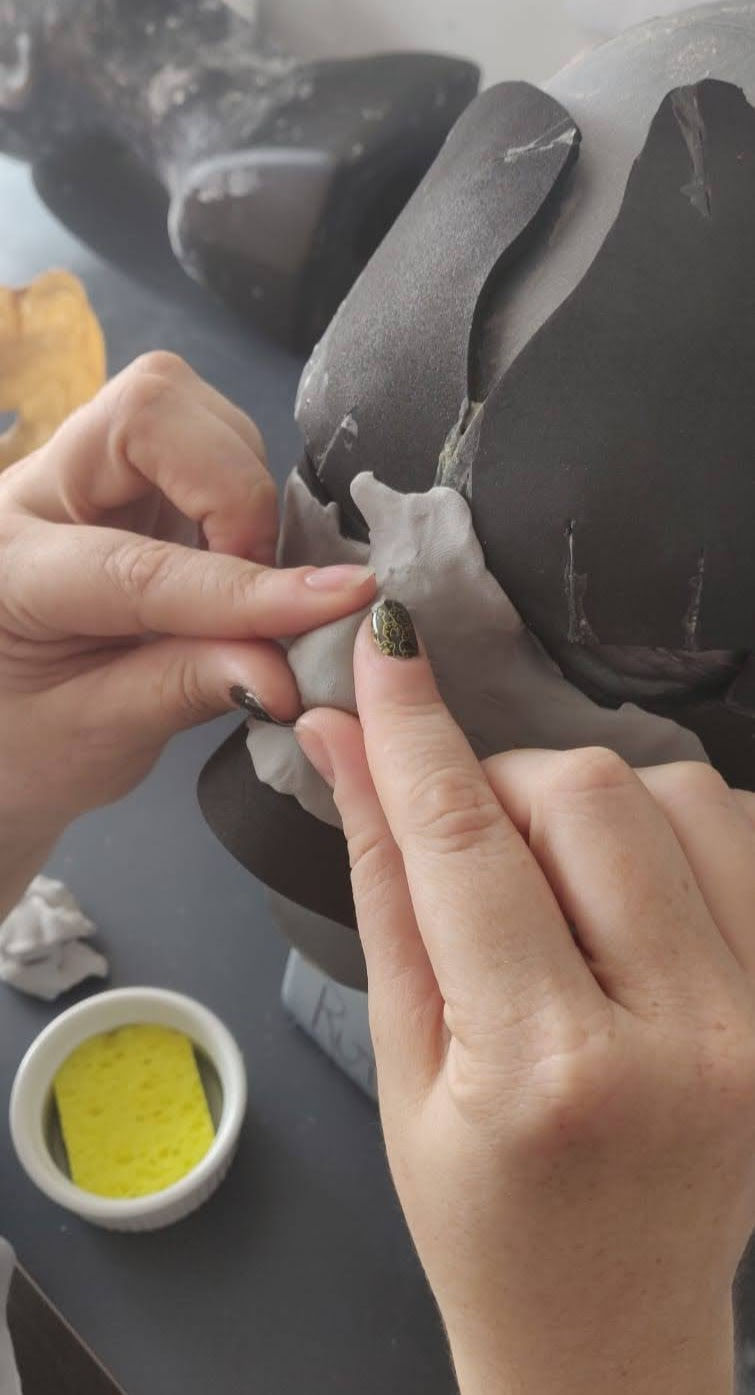
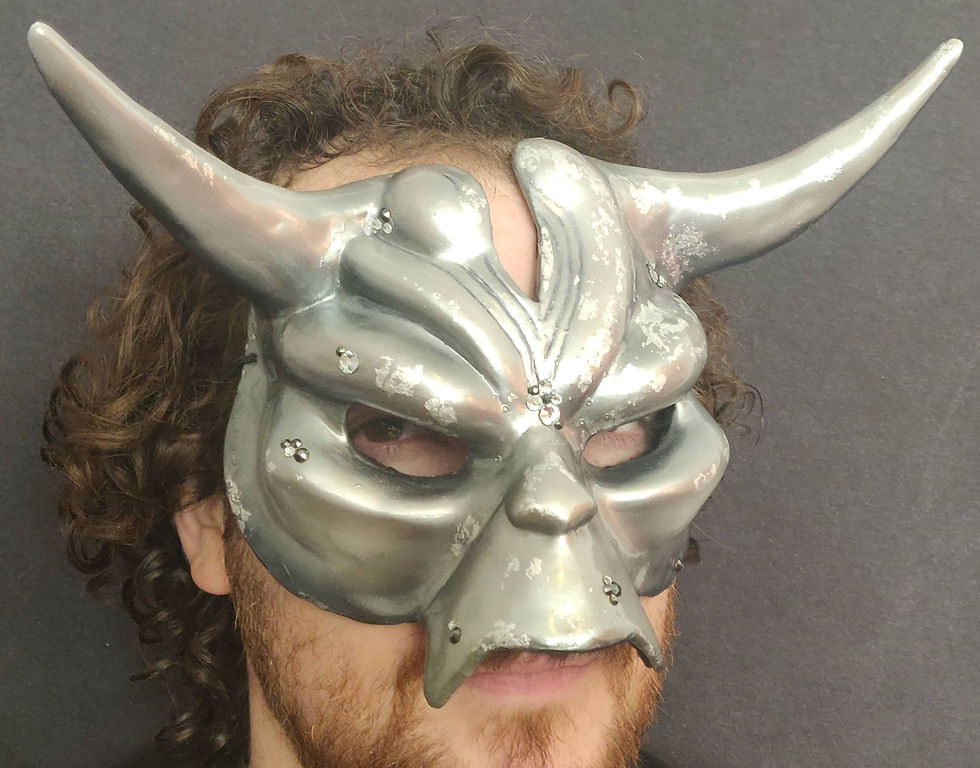
When I first set out to do the mask I did it directly on top of one the head forms I had. The foam clay stuck well to the face and I was able to build up from there. I really enjoyed sculpting with it. It doesn’t give those awful dry hands from traditional clay and I felt that I was able to melt seams together much better than I can with clay. When it comes out of the package it is very easy to shape and not sticky so it’s possible to shape without worrying about it getting stuck to anything. It is wet out of the package but it isn’t until you add water that it becomes slick and slippery and blends completely.

I found it was easiest to build up my shapes with dryer clay and then use water to smooth over all the joins. I also tried to build up the horns on the mask on the wet foam clay, hoping that maybe this material would allow such a thing, but as expected the wet clay was too heavy and it was clear the horns would need to be made separately.
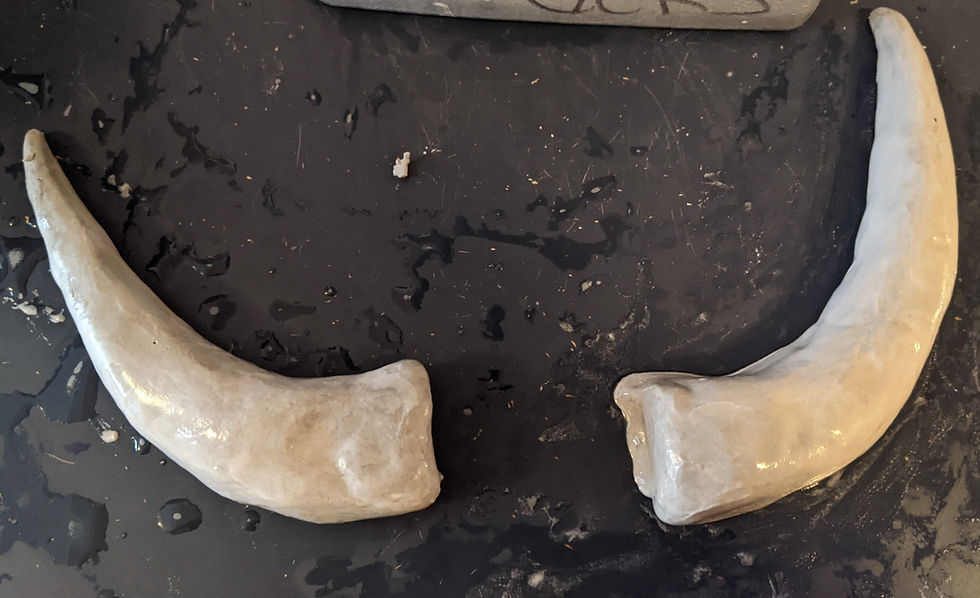
The horns were pretty easy to make, though getting the right curvature to look like the original was surprisingly harder than I had anticipated. Later I would realize I had completely goofed on the actual shape.
I waited three weeks to take my foam clay mask off the form as I knew it would take a long time to dry. In the back of my mind I had always been worrying about if it would stick to the head form, but I had nothing to do about it so I said I would just wait and see. Well, surprisingly it actually peeled off pretty well, all except the parts that were thin like the edges and on the nose bridge, which stuck to the head and ripped off of the mask.
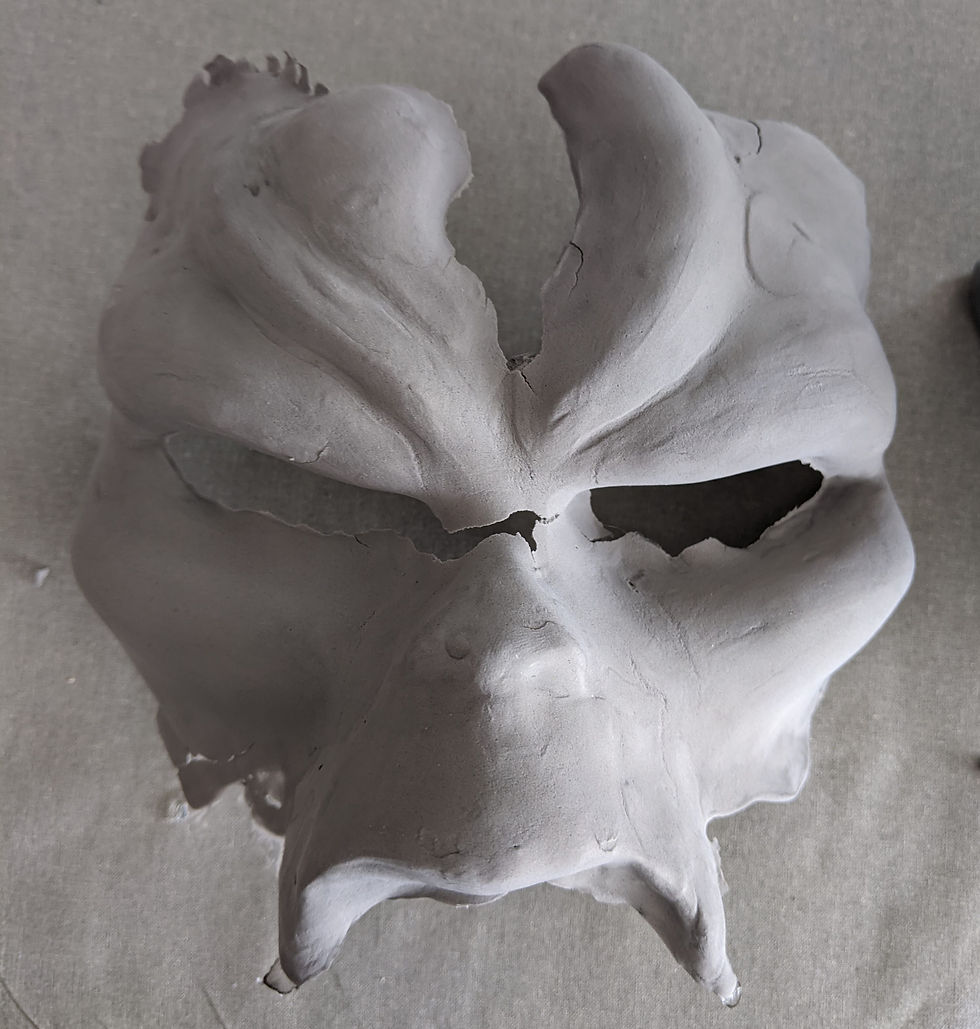

It was disappointing but not unexpected, it probably also could have been salvageable if I needed to, but I was excited about this material and didn’t mind doing it again. I was also surprised to see that the inside of the mask was definitely still quite wet. It has been sitting out since then and getting progressively harder, though again not rock hard yet.
I took this challenge as an opportunity to make another mask inside of a mask. In one of the foam clay tutorials I watched they made a small EVA mask to put the foam clay on top of so I thought I would try that.

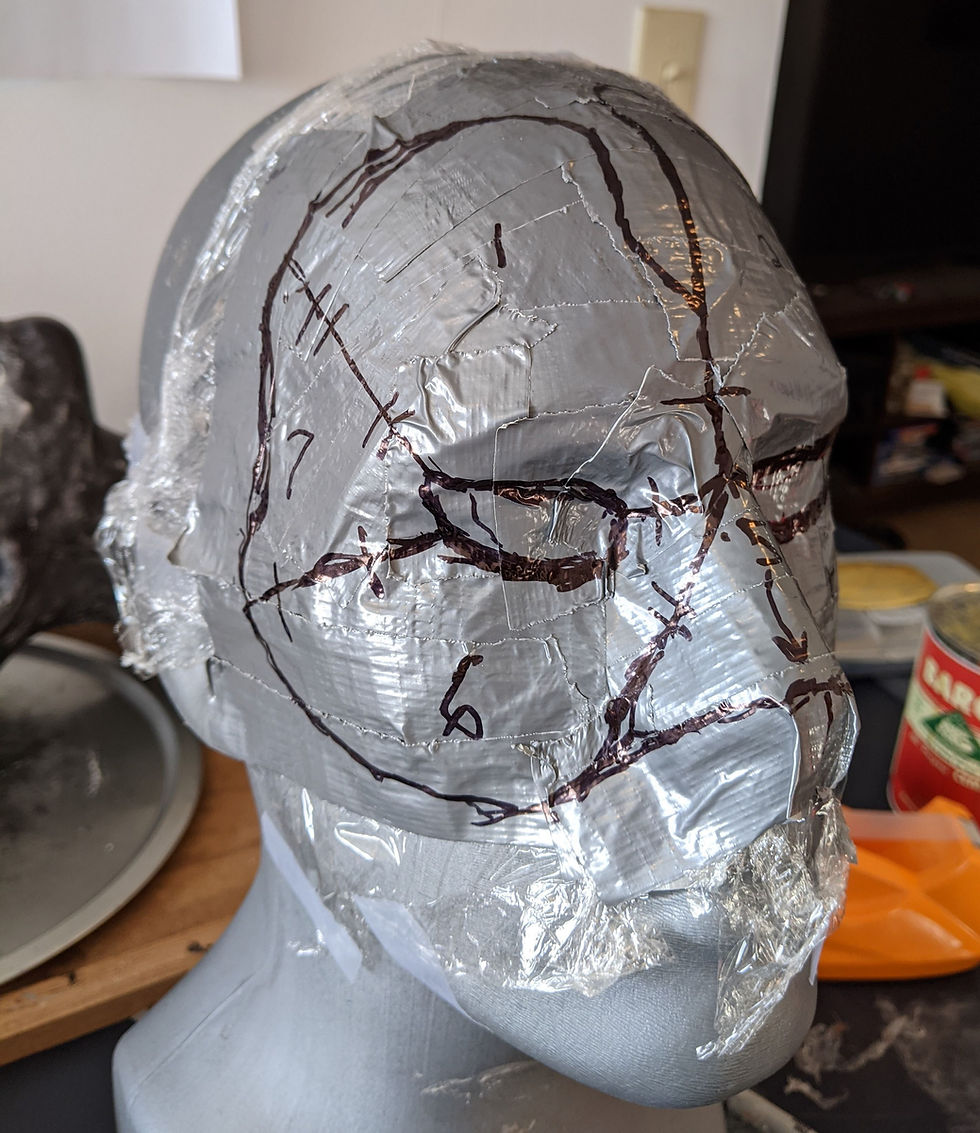
Making an EVA mask is another one of those things I have never done but was pretty sure I could do. I covered my mold in saran wrap and then began layering strips of duct tape on it until the whole mask was covered. I then drew cutting lines over areas that I thought would make the most sense in terms or forcing the curves around the face. If I could, I would go back and redo this part as I put a seam right over the nose and it was such a weak spot that I had to put another piece of foam behind it to brace it.


I cut the shapes out and any shape that didn’t lie flat I cut darts until it laid flat and then copied all of those pieces onto pattern paper. I then drew them onto thin EVA foam and cut them out with an exacto knife. Once cut, I used a heat gun to bend them slightly into the curve they needed to be in.

I pulled out my barge and got ready to glue. I first coated the darts with barge, let them dry, coated again, let them dry and then stuck them end to end. I had seen this done in many videos but I was still absolutely delighted by being able to butt pieces together and just have them stick, a true rarity in costume making. After all the darts were set I did the same gluing process to the edges of the pieces.


I found the piece that made the whole thing very shaped was the nose piece (which was extra big so I could cut it away) so I did that piece last and on the head form, applying heat to curve the pieces to the face. Once it was ready I wet the surface and started rebuilding the foam clay mask.


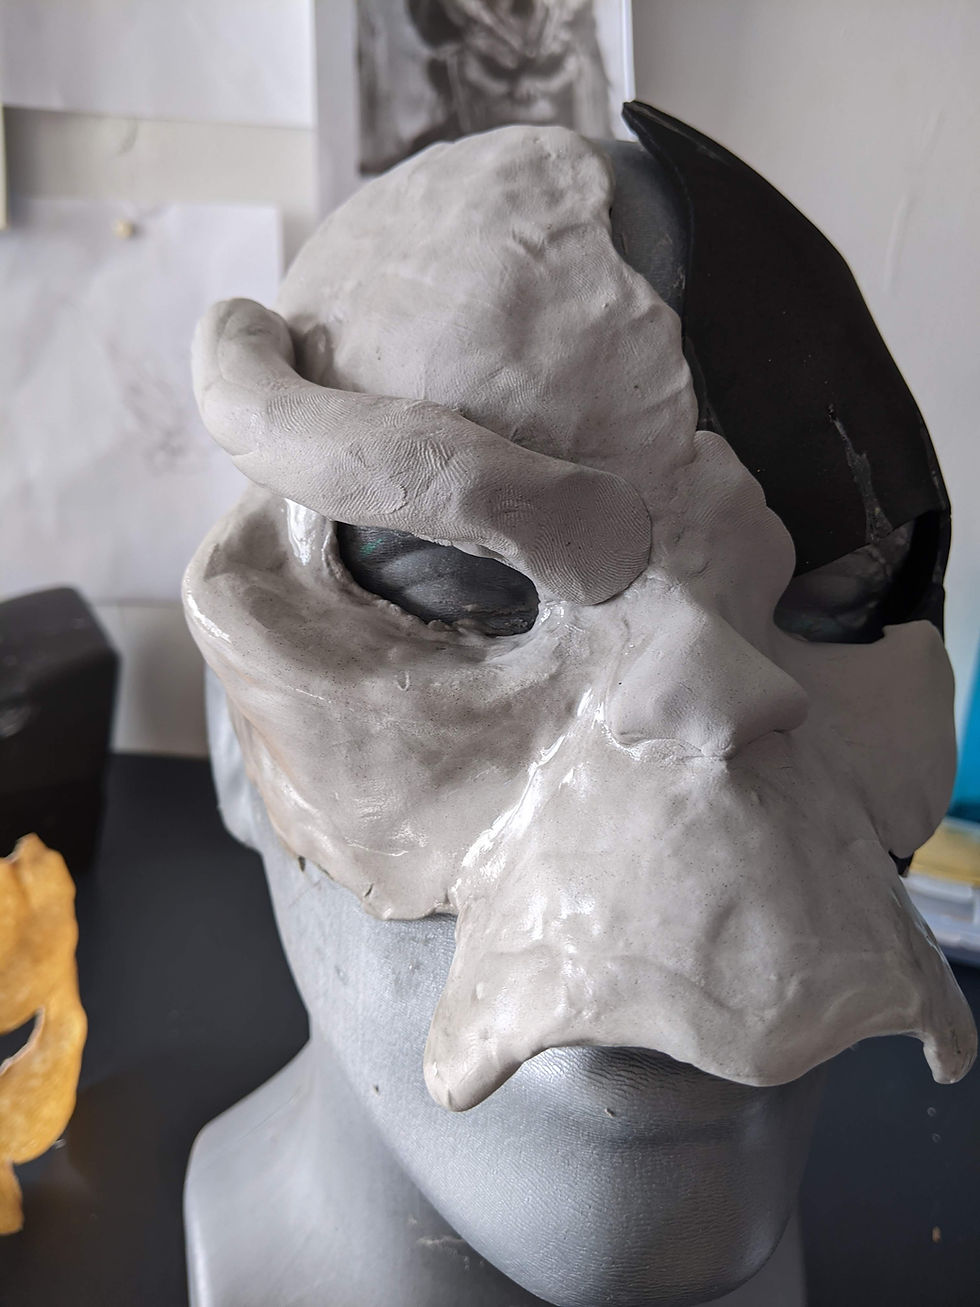
This time I only waited two days to take the mask off the form because it didn’t matter anyway as it was attached to the EVA and not the head. The next step was to attach the already formed horns. As I started positioning them around and looking at my research images I was struck by the fact that I had not really looked closely enough at the horns before and had them completely wrong in my head. It was unclear if they were symmetrical or not, and if the left side was higher than the right. I watched the scene again and looked at my screenshots but I didn’t really have a definitive answer, so I made the decision myself. I knew the new shape I wanted my horns to be and what I sculpted previously wasn’t right at all, but I was still hoping I’d be able to use them.

I sliced their bottoms open to put them at more correct angles and found that the insides were still wet and sticky (this is after four weeks), allowing me to test another aspect - would wet foam clay stick to dry foam clay? The answer is yes, which was extremely helpful.


I was able to position them and look at them and then also remove them without much residue being left behind. Once I had them placed where I thought they looked right I built up the sides with fresh wet clay, using water to smooth the wet piece onto the dry.

The dry clay never re-moistened, but the wet clay was able to adhere to it. I let that dry for two days and checked it and was pleased to see it seemed sturdy.


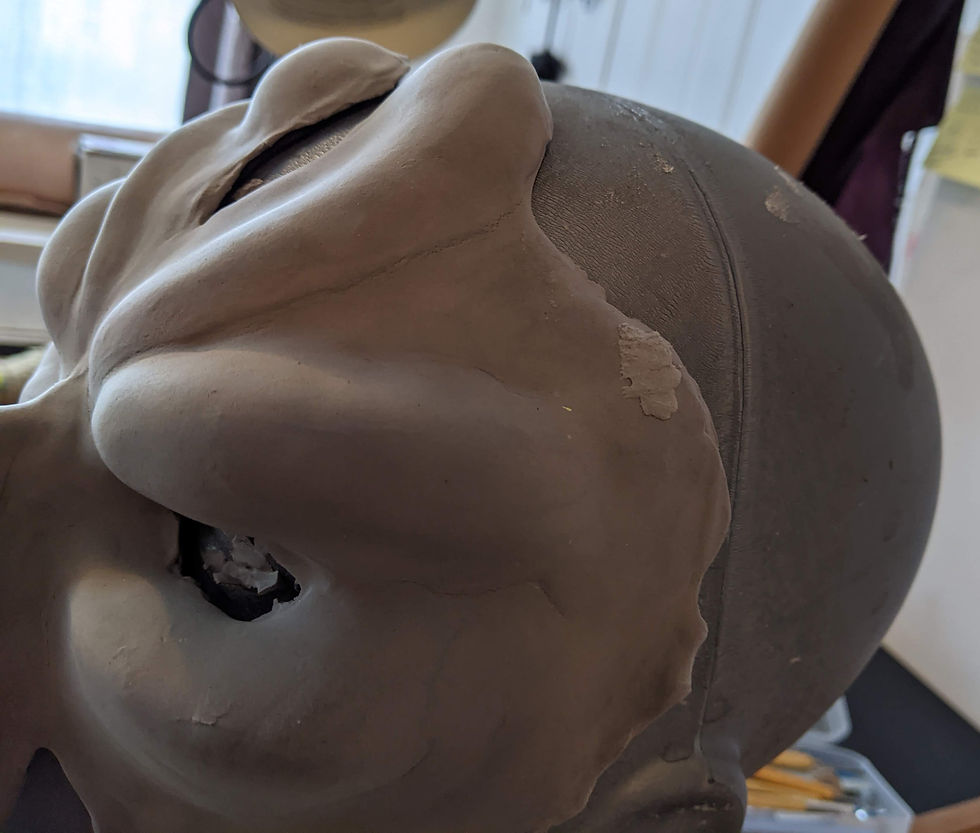
Though I tried to smooth the wet clay into the dry clay as best I could, the edges of the added clay were still pretty noticeable. This gave me a chance to pull out the dremel. I have used a dremel occasionally, but never really had the chance to learn it as a tool or work with it methodically, so I was excited to try it and also grateful I had a sample mask to practice on. Eventually after practicing sanding on the sample mask I moved to the horns and was happy to see how easily the edges were ground down. After the dremel I used a 400 grit sandpaper and was able to get everything nearly totally smooth. I think a finer grit would have made it even better but altogether I was impressed with how nicely it sanded.

From there this mask took on a second job of being a mold for me to form horns on. I did this because I didn’t trust that I could make the identical horn out of clay off of a head and I wanted to test the foam clay’s durability.

I wrapped it with saran wrap and then wrapped the horns with aluminum foil. I put a lot of pressure, steam and heat onto those horns, I formed four other pairs on them. When I finally pulled the saran wrap off there was no damage at all. I was very impressed that it held up so well.
Now that it was done being a mold it was time to refine it. I pulled out the original foam clay mask to practice technique on, this was maybe a month since I had last seen it and I was shocked to see how much it shrank.


It was broken at the nose so it hardened into the wrong shape, but even still it looked like it had shrunk almost half of an inch all the way around the edge and had tightened across the entire thing. This seems like another good reason to use an EVA base, it holds the foam into the shape it’s supposed to be. As far as I saw there was no pulling away from the edge of the EVA. I practiced drawing lines and doing sanding on the edge of the sample maks with a dremel and then moved onto the real mask.
The foam clay again dremeled nicely away, I felt I could speed up as I became more adept. I then went over the entire thing with a 400 grit sandpaper for a long time. I probably should have done it more, every cosplay video out there tells you you need to sand more than you think you do. After it was smooth enough for my eye I drew the detail lines into the forehead.

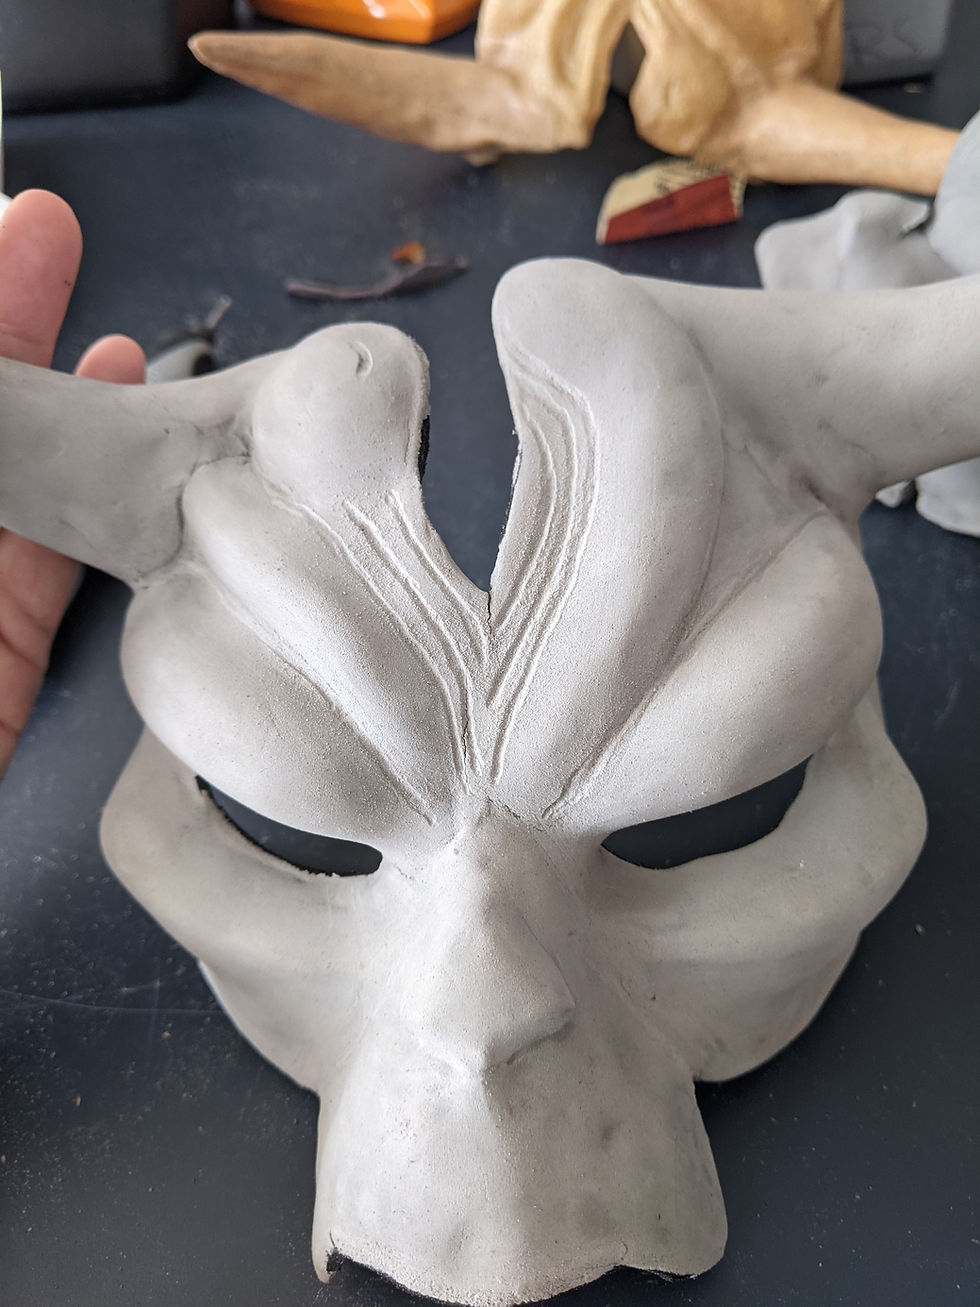
This was surprisingly easy to do, I made multiple passes over the same line to get depth. I also did a few lines to add dimension around the eyebrows and wondered if I should have been doing something similar on all of my masks. I was also able to curl the lip in by using a heat gun on both the foam clay and the EVA and slowly convincing it to move.


After painting (please see painting section for what I did) I lined the mask in felt. I didn't really want to, the EVA is very soft and smooth against the face, but it was really, really ugly. Perhaps there a paint coat I could have used, but at this point I was just ready to finish the mask. I used and awl to poke through a couple holes until I was able to make a hole big enough for the skinny elastic.


I had a lot of fun working with foam clay. I felt like a kid slapping silly putty on a newspaper and had more fun sculpting something than I think I ever have. I really got a feel for the material and enjoyed smoothing it out with water and getting to sculpt the mask instead of form it. I don’t know how I would have figured out the horns otherwise. Working with such a malleable and impressionable material gave me the freedom to try things in one way and then another with ease. There is also something that is just satisfying about having a solid piece instead of a shell, and while it’s the second heaviest of the bunch it’s still remarkably light. I will absolutely keep this material in my tool box.
Comments